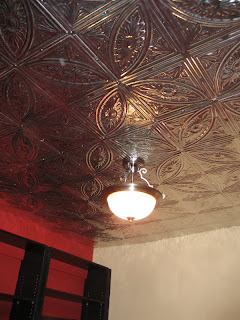
Cats on a Hot Tin Ceiling
 My wife and I spent the beginning of this past week assisting with putting up a tin ceiling in the home of our daughter and son-in-law. We first put up the ply ceiling (hunting for joists or rafters was a trial in itself). Doing so seemed to take forever -but in fact it did not.
The next day we rewired for new lighting. My son-in-law created sparks -literally- when I had forgotten the diagram for the wiring. He was shocked; I was amazed, amused, aahhh.....
A committee of everyone present determined the placement of the first tin tile. A great deal of time was spent in this endeaour -a great deal of time! However, its placement was crucial to the placement of all other tiles and their relationship to the symmetry of the walls. (Symmetry of the walls...!!! This is an "older" cottage home!) Nevertheless, the subsequent rows of tin tiles were parallel to the walls. Once the middle nine tiles were placed, we called it a day. Note that the major tool used is duct tape. The tape worked well in keeping the tiles in place prior to screwing them into the ply ceiling.

I had estimated that we would be four hours cutting and screwing up the remaining nineteen tiles as every tile had to be cut to accommodate the walls. Measure twice, then measure twice again and then cut. Now I measured and cut then handed each tile off to my son-in-law who taped it in place. He then screwed it up once my daughter assured him of the alignment. With this division of labour we were able to finish the ceiling in two hours.
Twas our first tin ceiling and we did a great job.
Well done, I say!


Comments